UWB module과 AWS IoT core (MQTT) 연동하는 방법입니다.
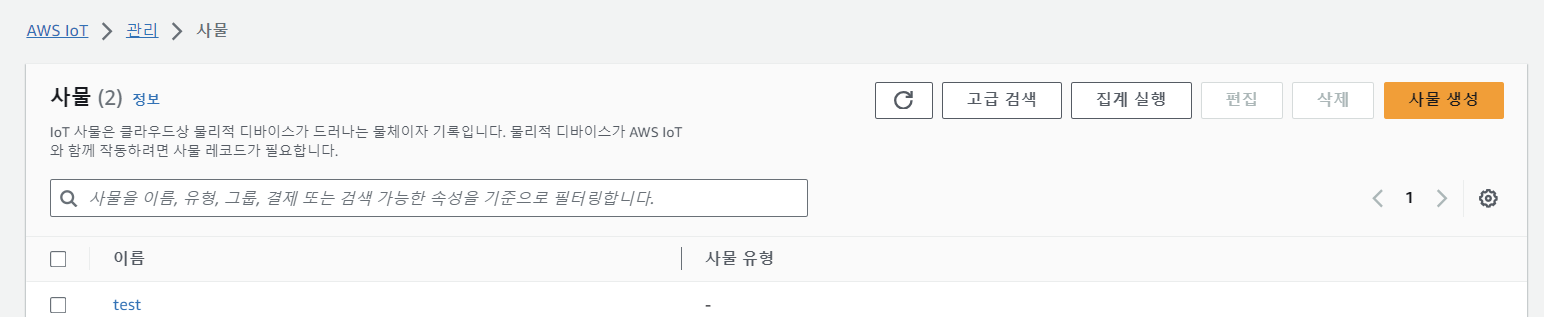
1. AWS 계정을 로그인 후, AWS IoT core > 사물 (Things)에 들어간다. After logging in to an AWS account, enter AWS IoT core > Things.
- AWS를 사용하면 비용이 발생한다는 것을 유의하고 시작한다.
2. Things를 생성해서 여기서 certificate, private, public key 파일과 CA1 파일 등을 모두 download 한다.
- 파일 다운은 생성 중에서만 가능하므로 download를 놓치지 않고 생성한다.
3. 실행할 file이 들어있는 folder에 'secrets.h' 파일을 생성해 아래와 같은 code를 넣는다. Create a "secrets.h" file in a folder containing the file to be executed and Put the code as follows.

- THINGNAME : 생성한 사물 이름
- WIFI_SSID , WIFI_PASSORD : 현재 사용하고 있는 wifi 정보
- AWS_IOT_ENDPOINT : AWS IoT core > MQTT 테스트 클라이언트 (MQTT test client) > 연결 세부 정보에서 '엔드 포인트(endpoint)'를 복사해서 가져온다.
Things 생성할 때 있는 파일은 file에 오른쪽 click > 연결 프로그램 > 메모장 을 켜서 file 내용을 복사 붙이기 하면 된다.
- AWS_CERT_CA : ~CA1.pem 파일 내용을 붙인다.
- AWS_CERT_CRT[] : ~certificate.pem.crt 파일 내용
- AWS_CERT_PRIVATE[] : ~private.pem.key 파일 내용
#include <pgmspace.h>

#define SECRET
#define THINGNAME "생성한 사물 이름 The name of the thing"

const char WIFI_SSID[] = "your wifi";
const char WIFI_PASSWORD[] = "wifi's password";

// MQTT 테스트 클라이언트 > 연결 세부 정보에서 '엔드 포인트'
const char AWS_IOT_ENDPOINT[] = "the thing's endpoint : ~amazonaws.com";

// Amazon Root CA 1
static const char AWS_CERT_CA[] PROGMEM = R"EOF(
-----BEGIN CERTIFICATE-----

-----END CERTIFICATE-----
)EOF";

// Device Certificate
static const char AWS_CERT_CRT[] PROGMEM = R"KEY(
-----BEGIN CERTIFICATE-----

-----END CERTIFICATE-----
)KEY";

// Device Private Key
static const char AWS_CERT_PRIVATE[] PROGMEM = R"KEY(
-----BEGIN RSA PRIVATE KEY-----

-----END RSA PRIVATE KEY-----
)KEY";
4. tag UWB를 실행할 code를 수정합니다. Modify the code to run tag UWB.
- secrets.h 파일 추가하기
- mqtt를 위한 변수 선언
- connectAWS() & publish() 생성
- publish할 때는 json 형태로 보내도록 한다. (doc을 이용해서)
#include <SPI.h>
#include "DW1000Ranging.h"
#include "secrets.h"
#include <Wire.h>
#include <WiFiClientSecure.h>
#include <MQTTClient.h>
#include <ArduinoJson.h>
#include <string>
#include <WiFi.h>
#include <PubSubClient.h>

// connection pins
const uint8_t PIN_RST = 27; // reset pin
const uint8_t PIN_IRQ = 34; // irq pin
const uint8_t PIN_SS = 4; // spi select pin

// MQTT client
WiFiClientSecure net = WiFiClientSecure();
MQTTClient client = MQTTClient(256);

#define AWS_IOT_PUBLISH_TOPIC "tag"

float len1 = 0.0; // anchor0 사이의 거리
float len2 = 0.0; // anchor1 사이의 거리

StaticJsonDocument<200> doc;

char msg_out[100];

char address[100];

void connectAWS()
{
  // WIFI 연결
  WiFi.mode(WIFI_STA);
  WiFi.begin(WIFI_SSID, WIFI_PASSWORD);

  Serial.println("Connecting to Wi-Fi");

  while (WiFi.status() != WL_CONNECTED){
    delay(500);
    Serial.print(".");
  }

  // Configure WiFiClientSecure to use the AWS IoT device credentials
  net.setCACert(AWS_CERT_CA);
  net.setCertificate(AWS_CERT_CRT);
  net.setPrivateKey(AWS_CERT_PRIVATE);

  // Connect to the MQTT broker on the AWS endpoint we defined earlier
  client.begin(AWS_IOT_ENDPOINT, 8883, net);

  Serial.println("Connecting to AWS IOT");

  while (!client.connect(THINGNAME)) {
    Serial.print(".");
    delay(100);
  }

  if(!client.connected()){
    Serial.println("AWS IoT Timeout!");
    return;
  }

  Serial.println("AWS IoT Connected!");

  bool connected = client.connect(THINGNAME);
  Serial.println(connected ? "MQTT Connected!" : "MQTT Connection Failed!");
}

// publish 함수
void publishMessage(){
  Serial.println();

  char jsonBuffer[512];
  serializeJson(doc, jsonBuffer); // print to client

  if(client.publish(AWS_IOT_PUBLISH_TOPIC, jsonBuffer)){
    Serial.println("success publish");
  }else{
    Serial.println("fail");
  }

}

void setup() {
  Serial.begin(115200);
  delay(1000);
  connectAWS();

  //init the configuration
  DW1000Ranging.initCommunication(PIN_RST, PIN_SS, PIN_IRQ); //Reset, CS, IRQ pin
  //define the sketch as anchor. It will be great to dynamically change the type of module
  DW1000Ranging.attachNewRange(newRange);
  DW1000Ranging.attachNewDevice(newDevice);
  DW1000Ranging.attachInactiveDevice(inactiveDevice);
  //Enable the filter to smooth the distance
  //DW1000Ranging.useRangeFilter(true);

  //we start the module as a tag
  DW1000Ranging.startAsTag("01:00:22:EA:82:60:3B:9C", DW1000.MODE_LONGDATA_RANGE_ACCURACY,0);
  //앞에 7D부분 숫자만 변경 (각 anchor마다 다르게 표시)
  // 0으로 지정하면 지정된 주소로 나온다
}

void loop() {
  DW1000Ranging.loop();
}

void newRange() {
  float len = DW1000Ranging.getDistantDevice()->getRange();
  float power = DW1000Ranging.getDistantDevice()->getRXPower();
  sprintf(address,"%d",DW1000Ranging.getDistantDevice()->getShortAddress());

  Serial.print("from: "); Serial.print(address);
  Serial.print("\t Range: "); Serial.print(len); Serial.print(" m");
  Serial.print("\t RX power: "); Serial.print(power); Serial.println(" dBm");

  doc["anchorAddress"] = address;
  doc["length"] = len;
  doc["power"] = power;

  publishMessage();
}

void newDevice(DW1000Device* device) {
  Serial.print("ranging init; 1 device added ! -> ");
  Serial.print(" short:");
  Serial.println(device->getShortAddress(), HEX);
}

void inactiveDevice(DW1000Device* device) {
  Serial.print("delete inactive device: ");
  Serial.println(device->getShortAddress(), HEX);
}
이게 끝입니다. anchor uwb는 tag에서 데이터를 mqtt로 전송하므로 aws 연동이 필요없습니다.
어려움이 있으면 최대한 답변해드립니다. ( 많이 늦게 볼 수 있습니다.. )
This is it. The anchor uwb transfers data from the tag to mqtt, so the anchor uwb is no need for aws interworking.
If there are any difficulties, I will answer as much as possible. ( But I can see it very late..)